Mod Podge Resin is a two-part epoxy system offering a clear, glossy finish․ Perfect for embedding objects, jewelry-making, and home decor, it’s food-safe and durable․
What is Mod Podge Resin?
Mod Podge Resin is a two-part epoxy system consisting of a clear resin and hardener․ When mixed in a 1:1 ratio, it creates a durable, high-gloss finish․ It’s ideal for crafting projects like jewelry, home decor, and embedding objects․ The resin is food-safe, non-toxic, and versatile, allowing artists to add colorants or embellishments․ Suitable for surfaces such as glass, ceramic, and wood, it’s perfect for creating protective, long-lasting finishes․ With proper mixing and curing, Mod Podge Resin delivers professional results for both beginners and experienced crafters․ Always use in a well-ventilated area for safety․
History and Development of Mod Podge Resin
Mod Podge Resin, developed by Plaid Enterprises, has its roots in the original Mod Podge adhesive introduced in the 1960s․ Initially a decoupage medium, Mod Podge evolved to meet crafting demands․ The resin line was launched to cater to the growing popularity of epoxy crafting, offering a clear, durable finish․ Over time, it became a favorite among DIY enthusiasts for its versatility and ease of use․ Known for its non-toxic, food-safe properties, Mod Podge Resin has expanded its applications, from jewelry-making to home decor, solidifying its place in the crafting world as a reliable and innovative product․
Popular Uses of Mod Podge Resin
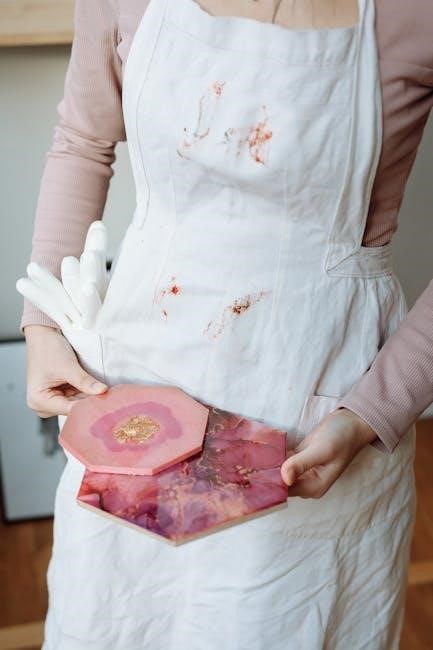
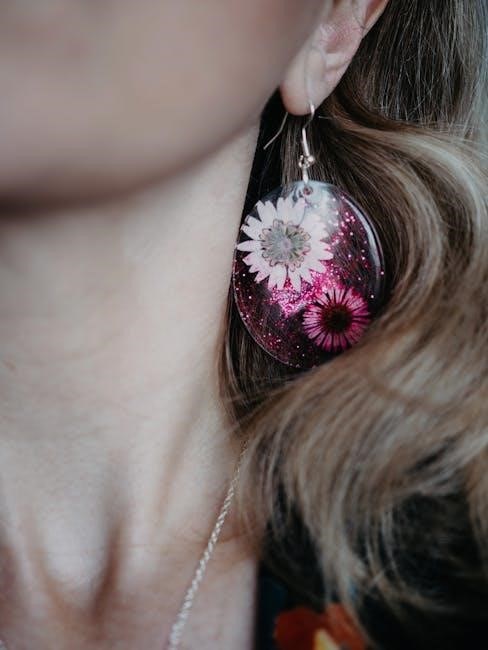
Mod Podge Resin is widely used for crafting unique, high-gloss projects․ It excels in jewelry-making, embedding flowers, photos, and embellishments․ DIY home decor, such as coasters and tabletops, benefits from its durability․ Artists utilize it for creating custom designs, while crafters apply it to puzzles, glass, and ceramics․ Its food-safe finish makes it ideal for kitchenware․ With add-ins like glitter and alcohol inks, it offers endless customization․ Suitable for both beginners and experienced crafters, Mod Podge Resin is a versatile medium that brings creative visions to life across various applications, from functional items to decorative pieces․
Materials Needed for Mod Podge Resin Projects
Essential materials include the Mod Podge Resin kit, mixing tools, protective gear, and prepared surfaces․ Ensure all items are ready for a smooth crafting experience․
Mod Podge Resin Kit Components
The Mod Podge Resin Kit includes two primary components: a clear resin and a hardener․ These are mixed in a 1:1 ratio to create a durable, glossy finish․ The kit is designed for crafting projects, such as jewelry, home decor, and embedding objects․ It is food-safe and has low VOCs, making it suitable for various applications․ The clear epoxy system ensures a high-quality, professional-looking result․ Additional items like mixing tools and protective gear may be needed but are not included in the base kit․ Always follow the instructions for proper mixing and application to achieve optimal results․
Mixing Tools and Equipment
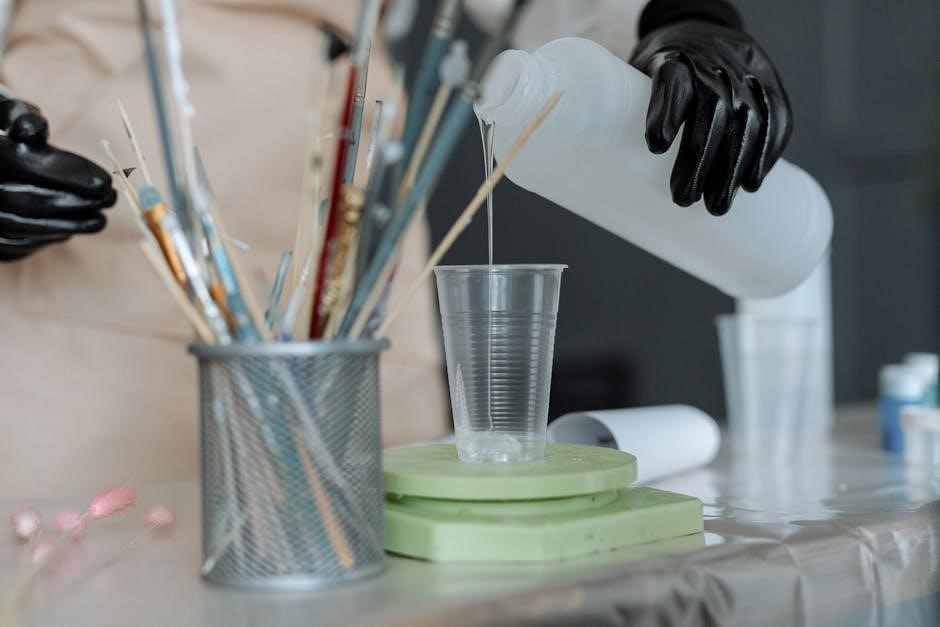
Essential tools for mixing Mod Podge Resin include a clean, heat-resistant mixing cup, a plastic stir stick, and a measuring cup for accurate 1:1 ratio mixing․ A digital scale can also be used for precise measurements․ A heat gun or torch is recommended to remove air bubbles during mixing․ Protective gloves and goggles should be worn to handle the resin safely․ Ensure all tools are clean and free from contaminants to avoid ruining the mixture․ Avoid using wooden or metal tools, as they may react with the resin․ Properly organized tools will streamline the mixing process and ensure successful project outcomes․
Protective Gear and Safety Supplies
When working with Mod Podge Resin, it’s crucial to wear appropriate protective gear to ensure safety․ This includes nitrile gloves to prevent skin contact, safety goggles to protect eyes from splashes, and a dust mask or respirator to avoid inhaling fumes; A well-ventilated workspace is essential to prevent the accumulation of harmful vapors․ Keep a fire extinguisher nearby and avoid working near open flames or sparks․ In case of spills, have paper towels or absorbent materials ready for cleanup․ Always refer to the Safety Data Sheet (SDS) provided by Plaid for detailed safety precautions and emergency procedures․ Proper safety measures ensure a safe and enjoyable crafting experience․
Surfaces and Substrates for Application
Mod Podge Resin works best on clean, dry, and oil-free surfaces․ It adheres well to wood, metal, glass, ceramic, and plastic, making it ideal for crafts like coasters, jewelry, and home decor․ For paper or fabric, apply a thin layer of Mod Podge as a sealant before pouring resin to ensure proper adhesion․ Avoid applying resin to porous or uneven surfaces without proper preparation, as this may lead to peeling or uneven finishes․ Always test a small area first to ensure compatibility and desired results․ Proper surface preparation ensures a strong bond and a professional-looking finish for your resin projects․

Safety Precautions When Working with Mod Podge Resin
Wear protective gloves, goggles, and work in a well-ventilated area․ Follow SDS guidelines, avoid skin contact, and store resin in original packaging at 60-70°F․
Personal Protective Equipment (PPE)
When working with Mod Podge Resin, wear protective gloves to prevent skin irritation and goggles to safeguard your eyes from accidental splashes․ Ensure proper ventilation to avoid inhaling fumes․ Avoid skin contact, as it may cause irritation․ Keep the workspace clean and away from children and pets․ Always follow the Safety Data Sheet (SDS) guidelines provided by the manufacturer․ Use a well-ventilated area to minimize exposure to VOCs․ Proper PPE ensures a safe and enjoyable crafting experience with Mod Podge Resin․
Ventilation and Workspace Requirements
Ensure your workspace is well-ventilated to avoid inhaling fumes from the resin․ Open windows or use a fan to maintain airflow, preventing VOCs from accumulating․ Work in a clean, dry area away from direct sunlight and heat sources․ Maintain a consistent temperature between 60-70°F (15-21°C) for optimal curing․ Avoid working in confined or poorly ventilated spaces, as this can slow curing and increase health risks․ Keep the area free from dust and debris to ensure a smooth finish․ Proper ventilation and a controlled environment are essential for safe and successful Mod Podge Resin projects․
Handling and Storing Mod Podge Resin
Store Mod Podge Resin in its original packaging, ensuring the bottles are tightly sealed to prevent contamination․ Keep it in a warm, dry place, maintaining a consistent temperature between 60-70°F (15-21°C)․ Avoid exposure to direct sunlight, heat sources, or moisture, as this can affect the resin’s integrity․ Always handle the resin with clean, dry tools and gloves to prevent skin contact․ If not in use, store the kit upright to avoid leakage․ Proper storage ensures the resin remains stable and ready for use․ Follow the manufacturer’s guidelines for shelf life and disposal instructions to maintain safety and effectiveness․
Emergency Procedures and First Aid
In case of skin contact with Mod Podge Resin, wash the affected area thoroughly with soap and warm water․ For eye exposure, flush with plenty of water for at least 15 minutes and seek medical attention․ If ingestion occurs, do not induce vomiting; contact a poison control center or healthcare provider immediately․ For inhalation of fumes, move to fresh air and seek medical help if breathing difficulties persist․ Keep the Safety Data Sheet (SDS) accessible and follow all emergency response guidelines․ Always have a first aid kit nearby and ensure emergency contact numbers are readily available․
Preparing Your Workspace for Mod Podge Resin
Ensure a clean, stable surface and good ventilation․ Organize tools and safety gear like gloves and goggles․ This setup is essential for successful resin projects․
Cleanliness and Surface Preparation
Cleanliness is crucial when working with Mod Podge Resin․ Ensure your workspace is free from dust, dirt, and moisture for optimal results․ Surfaces should be dry and prepared, as any imperfections may affect the resin’s finish․ Use a lint-free cloth to wipe down surfaces and remove contaminants․ For best adhesion, lightly sand or prime surfaces if necessary․ Avoid applying resin in humid environments, as this can delay curing․ Proper preparation ensures a smooth, even application and a professional-looking finish․ Always follow Plaid’s guidelines for surface preparation to achieve the best outcomes with your Mod Podge Resin projects․
Setting Up a Well-Ventilated Area
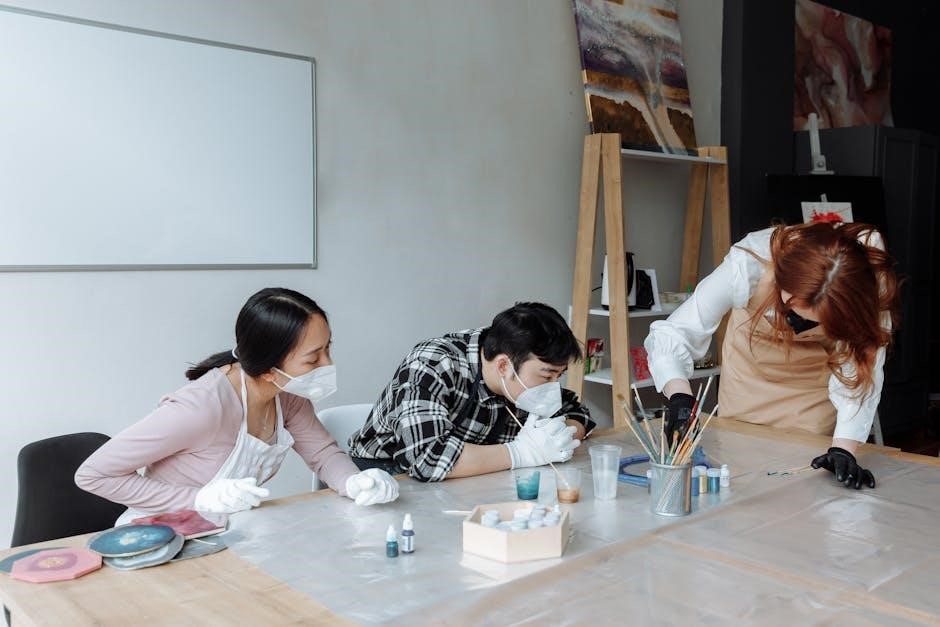
Setting up a well-ventilated workspace is essential when working with Mod Podge Resin to ensure safety and comfort․ Always work in an open, airy environment or near a window to prevent inhaling fumes․ Use a fan to circulate air, reducing the concentration of vapors․ Avoid working in confined or poorly ventilated spaces, as this can lead to respiratory discomfort․ Wearing a ventilation mask is also recommended for added protection․ Proper airflow not only enhances safety but also helps prevent dust and particles from settling on your project․ Ensure good ventilation throughout the mixing, application, and curing processes for optimal results․
Organizing Tools and Materials
Organizing your tools and materials is crucial for a smooth and efficient Mod Podge Resin project․ Gather all necessary supplies, such as measuring cups, stir sticks, protective gloves, and a well-ventilated workspace․ Keep resin and hardener bottles easily accessible, ensuring their caps are tightly sealed when not in use․ Prepare surfaces or substrates in advance, cleaning them thoroughly to avoid contaminants․ Having a dedicated workspace with all tools laid out helps prevent errors and saves time․ Use a mixing cup with clear measurements for accurate ratios, and store unused materials in their original packaging․ A clutter-free, organized setup ensures a successful and enjoyable crafting experience․
Mixing Mod Podge Resin
Mixing Mod Podge Resin requires a precise 1:1 ratio of resin and hardener․ Combine slowly, avoiding air bubbles, and let rest briefly before pouring into your project․
Understanding the 1:1 Ratio
The 1:1 ratio is crucial for proper curing․ Equal parts resin and hardener ensure a durable, glossy finish․ Measure accurately to avoid issues like soft spots or incomplete hardening․ Always mix thoroughly for 3 minutes to achieve a uniform consistency․ Avoid overmixing, as it can introduce air bubbles; Let the mixture rest for 2 minutes to allow any bubbles to rise and dissipate․ This step ensures a smooth application and professional-looking results․ Proper mixing is the foundation of a successful Mod Podge Resin project, so attention to detail is essential․
Step-by-Step Mixing Instructions
Begin by preparing your workspace with gloves, goggles, and a well-ventilated area․ Ensure both resin and hardener bottles are at room temperature․ Pour equal amounts of resin and hardener into a mixing cup, following the 1:1 ratio․ Use a digital scale for precise measurements․ Stir slowly with a silicone spatula for 3 minutes, scraping the sides and bottom to ensure thorough mixing․ Allow the mixture to rest for 2 minutes to release air bubbles․ Use a torch to gently remove any remaining bubbles․ Pour the mixture immediately onto your project surface and spread evenly with a brush or spreading tool․ Work quickly, as the mixture will begin to set within 20-30 minutes․
Common Mistakes to Avoid During Mixing
- Inaccurate Ratio: Never deviate from the 1:1 ratio of resin to hardener, as this disrupts curing․
- Insufficient Mixing: Stir thoroughly for 3 minutes, scraping the cup’s sides and bottom to prevent unmixed resin․
- High Speed Stirring: Avoid fast stirring, which introduces air bubbles, leading to uneven finishes․
- Cold Workspace: Mix in a warm environment (60-70°F) to ensure proper chemical reaction․
- Skipping Rest Time: Allow the mixture to sit for 2 minutes to release trapped air for a bubble-free result․

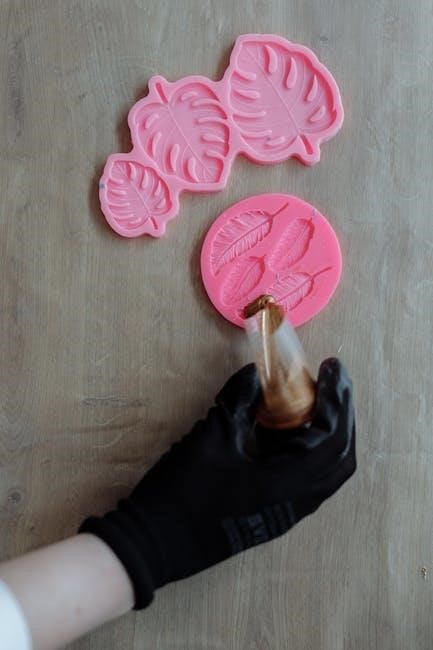
Applying Mod Podge Resin
Apply Mod Podge Resin in thin, even layers for a smooth finish․ Ideal for embedding flowers, photos, or embellishments, it dries clear and glossy, perfect for crafts on wood, glass, or fabric․
Techniques for Smooth Application
For a smooth application, apply Mod Podge Resin in thin, even layers using a foam brush or soft paintbrush․ Ensure the surface is clean, dry, and free of dust․ Mix the resin and hardener in a 1:1 ratio, stirring thoroughly for 3 minutes to avoid air bubbles․ Work in a well-ventilated area to prevent inhaling fumes․ Use a torch or toothpick to gently remove any bubbles that form․ Allow each layer to dry completely before adding additional coats․ Avoid over-mixing, as this can create bubbles․ For best results, apply in a consistent motion, covering the entire surface evenly․ Practice on small projects to master the technique․
Adding Colorants and Embellishments
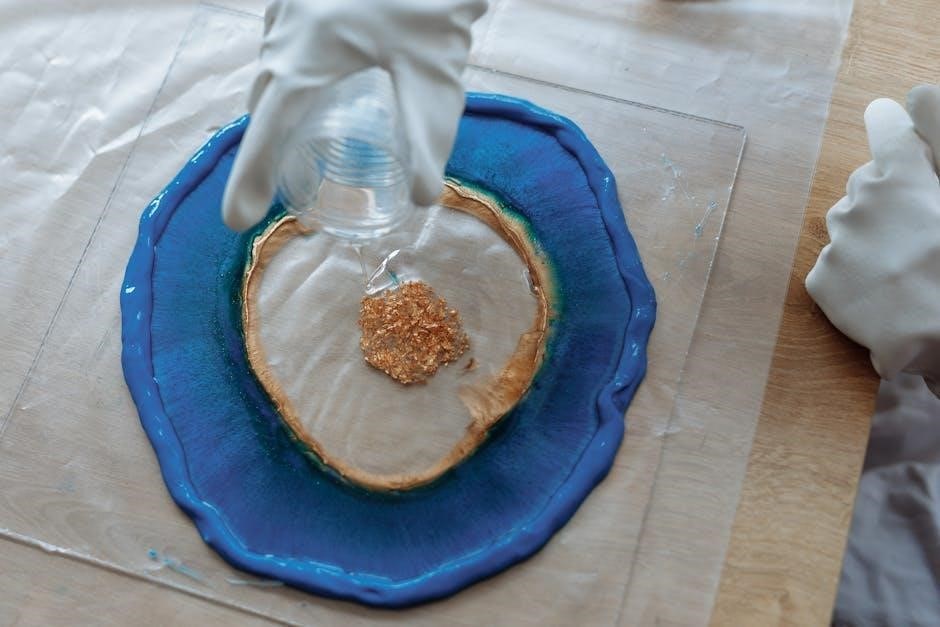
Enhance your Mod Podge Resin projects by adding colorants like alcohol inks or pigments․ Mix them into the resin before pouring for a vibrant finish․ For embellishments, incorporate glitter, beads, or dried flowers by gently folding them into the mixed resin․ Ensure additions are fully coated for a seamless look․ Avoid overloading, as this can affect the resin’s clarity․ Use a torch to remove bubbles that may form around embellishments․ Practice on small projects to achieve the desired effect․ Experiment with combinations to create unique, personalized designs, making each piece truly one-of-a-kind․ This step allows for endless creativity and customization in your resin crafts․
Creating Textures and Patterns
Mod Podge Resin allows for creative texture and pattern-making․ Use tools like brushes, sponges, or textured surfaces to manipulate the resin before it cures․ Drag a toothpick or skewer through wet resin for swirls or geometric patterns․ Layer resin in contrasting colors for dimensional effects․ Embed fabrics, paper, or natural elements to add organic textures․ Experiment with dripping or drizzling techniques for abstract designs․ For intricate patterns, use molds or stencils to guide the resin flow․ Work quickly, as the resin begins setting within 20-30 minutes․ These methods enable you to craft unique, visually striking pieces with personalized textures and designs, making each project truly distinctive․

Drying and Curing Mod Podge Resin
Mod Podge Resin dries to the touch in 20-30 minutes and fully cures within 24 hours․ Ensure a clean, dry environment for even drying and hardening․
Understanding the Curing Process
The curing process for Mod Podge Resin involves a chemical reaction between the resin and hardener․ After mixing, the mixture begins to set within 20-30 minutes, forming a strong bond․ Full curing occurs within 24 hours, resulting in a durable, high-gloss finish․ Proper environmental conditions, such as a clean, dry workspace with temperatures between 60-70°F, are crucial for optimal results․ Avoid disturbing the resin during curing to prevent imperfections․ Once cured, the resin is food-safe and suitable for various applications, including jewelry, home decor, and crafts․
Factors Affecting Drying Time
Mod Podge Resin drying time is influenced by environmental conditions․ Higher temperatures (70-80°F) accelerate curing, while lower temperatures slow it down․ Humidity levels also play a role; high humidity can delay drying․ The thickness of the resin layer matters, with thinner layers drying faster․ Proper mixing of the 1:1 ratio ensures optimal curing․ Contaminants or improper surface preparation can hinder the process․ Always follow instructions for best results, as these factors collectively determine the resin’s drying and curing efficiency․
Post-Curing Care and Handling
After Mod Podge Resin has fully cured, handle it with care to maintain its finish․ Store cured projects in a dry, cool environment, away from direct sunlight․ Avoid exposing the resin to extreme temperatures or harsh chemicals․ For cleaning, use a soft, dry cloth to wipe away dust or debris․ If necessary, lightly dampen the cloth with water, but avoid abrasive cleaners․ Properly store unused Mod Podge Resin in its original packaging, keeping it in a warm, stable environment (60-70°F)․ Ensure brushes are cleaned with soap and water immediately after use to prevent resin from hardening on them․
Troubleshooting Common Issues
Troubleshooting Mod Podge Resin issues involves addressing bubbles, uneven surfaces, and mixing errors․ Use a torch to remove bubbles and ensure proper ratio mixing․ Resurface streaks lightly․
Dealing with Bubbles and Air Pockets
Bubbles and air pockets are common issues when working with Mod Podge Resin․ To prevent them, mix the resin and hardener slowly and thoroughly․ Use a torch or heat gun to gently remove bubbles that rise to the surface․ If bubbles form after pouring, allow the resin to rest for a few minutes before using the torch again․ For deep air pockets, carefully pour a small amount of additional mixed resin over the area․ Work in a well-ventilated space and ensure your surface is clean and dry before application․ Proper mixing and patience are key to achieving a smooth, bubble-free finish․
Fixing Uneven Surfaces and Streaks
To address uneven surfaces or streaks in Mod Podge Resin, start by allowing the resin to cure completely․ Once hardened, lightly sand the affected area using fine-grit sandpaper to create a smooth base․ Wipe away dust with a lint-free cloth․ Apply a thin, even coat of fresh resin mixture, spreading it evenly with a credit card or brush․ Avoid overworking the resin, as this can reintroduce streaks․ If streaks persist, repeat the process, ensuring each layer is thin and evenly applied․ Work methodically to achieve a uniform finish, allowing proper curing time between layers for optimal results․
Solving Mixing Ratio Problems
Ensuring the correct 1:1 ratio of resin to hardener is crucial for proper curing․ If the ratio is off, the resin may not harden or could remain sticky․ To fix this, carefully remeasure both components using a digital scale for accuracy․ If you’ve already mixed too much of one part, start over with fresh, precisely measured quantities․ Avoid guessing measurements, as this often leads to uneven curing․ For small batches, use measuring cups or syringes for precise amounts․ Always refer to the instructions on the Mod Podge Resin packaging for guidance․ Proper measurement ensures a strong, durable finish for your project․
Advanced Techniques with Mod Podge Resin
Explore layering, embedding objects, and adding colorants like glitter or inks for unique designs․ Combine resin with other materials for intricate, professional-looking crafts and artistic expressions․
Layering and Building Up Resin
Layering with Mod Podge Resin allows for complex, multidimensional designs․ Start with a thin base layer, allowing it to cure fully before adding subsequent layers․ Use a torch to remove air bubbles between layers for a smooth finish․ To build up resin, pour small amounts, ensuring each layer adheres properly․ This technique is ideal for creating depth in jewelry, decorative items, or artwork․ Experiment with adding embellishments like glitter or pigments between layers for unique effects․ Proper curing between layers is essential to avoid cracking or unevenness․ With patience, layering can produce stunning, professional-quality results in your resin projects․
Combining with Other Craft Materials
Mod Podge Resin seamlessly integrates with various craft materials, expanding creative possibilities․ Combine it with glitter, alcohol inks, or pigments for vibrant effects․ Mix with decoupage elements like paper or fabric for textured designs․ Embed found objects, beads, or sequins to add dimension․ Use it as a sealant over artwork or photos for protection and gloss․ Experiment with layering resin over paint or markers for intricate patterns․ Its compatibility with materials like glass, ceramic, and wood makes it ideal for mixed-media projects․ By blending Mod Podge Resin with other supplies, crafters can achieve unique, durable, and visually striking results in jewelry, home decor, and more․
Creating Complex Designs and Patterns
Mod Podge Resin excels in creating intricate designs and patterns, allowing crafters to push their creativity․ Achieve multi-dimensional effects by layering resin with pigments, glitters, or metallic powders․ Use molds or stencils to craft geometric shapes or organic forms․ Experiment with color gradients by mixing resin with inks or dyes, then blending hues during the pour․ Add texture by incorporating beads, sequins, or small objects into the design․ For precise patterns, apply resin in thin layers, allowing each to cure before adding the next․ This method enables detailed, high-resolution designs․ With patience and planning, complex visuals like marbling, swirls, or even 3D effects can be achieved, making each piece truly unique․
Mod Podge Resin offers endless creative possibilities for crafting unique, durable pieces․ With proper techniques and safety, you can achieve stunning results․ Experiment, create, and enjoy the process!
Final Tips for Successful Projects
- Always measure the 1:1 ratio accurately to ensure proper curing․
- Stir thoroughly for 3 minutes to avoid swirls and air bubbles․
- Work in a clean, well-ventilated area for best results․
- Use a torch to remove air bubbles for a smooth finish․
- Allow the resin to cure fully before handling or displaying․
- Experiment with additives like glitter or inks for unique designs․
- Store leftover resin in a warm, dry place for future projects․
Encouragement to Experiment and Create
Mod Podge Resin is a versatile medium that invites creativity and experimentation․ Don’t be afraid to try new techniques, mix in unique embellishments, or combine it with other craft supplies․ Whether you’re making jewelry, home decor, or mixed media art, this resin offers endless possibilities․ Add glitter, inks, or pigments to create vibrant, one-of-a-kind pieces․ Remember, every project is an opportunity to learn and grow, so embrace imperfections as part of the creative journey․ With its forgiving nature, Mod Podge Resin is perfect for crafters of all skill levels․ Let your imagination shine and enjoy the process of bringing your ideas to life!
Leave a Reply
You must be logged in to post a comment.